> ## Documentation Index
> Fetch the complete documentation index at: https://docs.agentaos.ai/llms.txt
> Use this file to discover all available pages before exploring further.
# Connect Claude.ai or ChatGPT
> Add the AgentaOS connector to Claude.ai or ChatGPT, approve it once, and run your account from chat.
The AgentaOS connector lets a hosted assistant run your AgentaOS account from chat: create products and checkouts, submit your verification, and manage subscriptions, customers and invoices. You add one URL to your assistant and approve the connection on an AgentaOS page. You paste no key.
The connector URL is:
```text theme={"system"}
https://mcp.agentaos.ai/mcp
```
If you do not have an AgentaOS account yet, sign in with a new email during the approval step. That creates your account.
## Add the connector
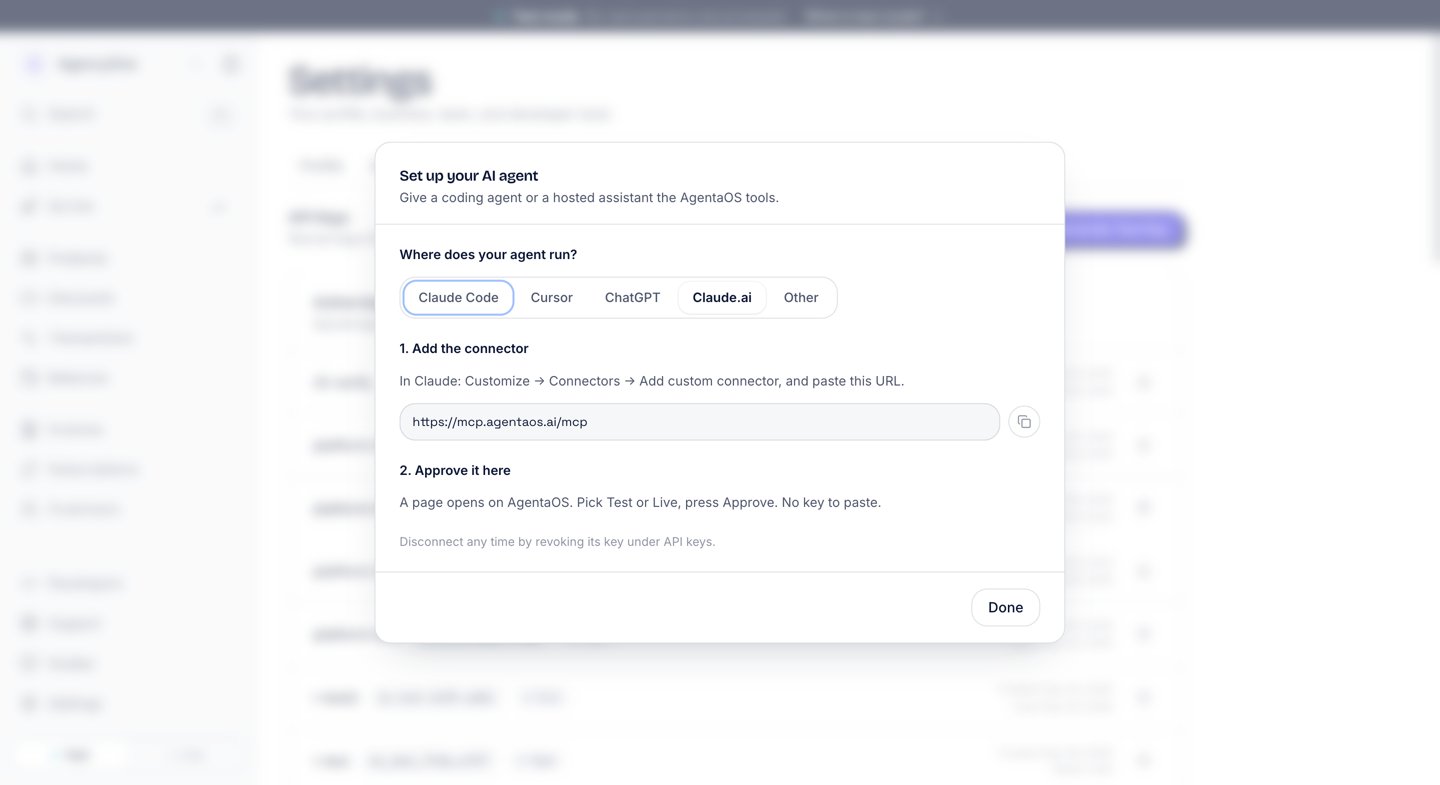
In Claude.ai or the Claude desktop app, open **Customize → Connectors → Add custom connector** and paste the connector URL.
In ChatGPT, open **Settings → Connectors → Create** and paste the connector URL.
The dashboard shows the same steps: open **Developers → API keys** in the sidebar, click **Connect an AI agent** and choose your assistant in the **Set up your AI agent** dialog.
 ## Approve the connection
When you add the connector, your assistant opens an AgentaOS page.
If you are not signed in to AgentaOS, click **Sign in to continue**. After you sign in, the page comes back.
The page shows **Connect** followed by your assistant's name, then **to AgentaOS**. Pick **Test mode** or **Live mode**:
* **Test mode**: "Nothing is charged. Good for trying it out."
* **Live mode**: "Real payments on your live account."
The page starts on the mode your dashboard is in. If you have never switched the dashboard to live, it starts on Test mode.
Click **Approve**. The page shows "Sending you back to" your assistant, and you return to the chat.
When you approve, AgentaOS creates an API key on your account for the mode you picked. The key carries your assistant's name, and every tool call from the assistant uses it. A connection in test mode sees only test data.
## Switch from Test to Live
The mode is fixed when you approve. To take live payments from chat, [disconnect](#disconnect), add the connector again and pick **Live mode**. Live payments also need a verified business: see [Go live](/guides/go-live).
## Available tools
Your assistant gets all 31 AgentaOS tools, the same set as every other client. [MCP server](/mcp/setup#tools) lists each one.
Ask in plain words. For example:
> What is my AgentaOS status?
> Create a monthly plan called Pro at 29 euros.
> Create a discount code LAUNCH20 for 20% off.
> Is my business verification done yet?
Each tool answers with a plain sentence, which your assistant passes on to you.
## Disconnect
In the sidebar, open **Developers → API keys**. Under **API Keys**, find the key with your assistant's name.
Click the delete icon on that key, then **Confirm**.
After that, every tool call from the assistant fails. The error ends with: "The key may have been revoked in AgentaOS. Create a new key, or reconnect the connector." To use the assistant again, add the connector again and approve it.
## Troubleshooting
| Message | What to do |
| - | - |
| This approval expired. Start the connection again. | Add the connector again and approve on the new page. |
| This approval link expired. Start the connection again. | More than 10 minutes passed between adding the connector and approving it. Add the connector again. |
| The connection was declined in AgentaOS. | Add the connector again and click **Approve** this time. |
| AgentaOS has not confirmed the approval yet. Try connecting again. | Add the connector again. |
| The key may have been revoked in AgentaOS. Create a new key, or reconnect the connector. | The key was revoked. Add the connector again and approve it. |
## Next steps
Every tool, and the setup for Claude Code and Cursor.
The walkthrough, from the first prompt to a paid checkout.
## Approve the connection
When you add the connector, your assistant opens an AgentaOS page.
If you are not signed in to AgentaOS, click **Sign in to continue**. After you sign in, the page comes back.
The page shows **Connect** followed by your assistant's name, then **to AgentaOS**. Pick **Test mode** or **Live mode**:
* **Test mode**: "Nothing is charged. Good for trying it out."
* **Live mode**: "Real payments on your live account."
The page starts on the mode your dashboard is in. If you have never switched the dashboard to live, it starts on Test mode.
Click **Approve**. The page shows "Sending you back to" your assistant, and you return to the chat.
When you approve, AgentaOS creates an API key on your account for the mode you picked. The key carries your assistant's name, and every tool call from the assistant uses it. A connection in test mode sees only test data.
## Switch from Test to Live
The mode is fixed when you approve. To take live payments from chat, [disconnect](#disconnect), add the connector again and pick **Live mode**. Live payments also need a verified business: see [Go live](/guides/go-live).
## Available tools
Your assistant gets all 31 AgentaOS tools, the same set as every other client. [MCP server](/mcp/setup#tools) lists each one.
Ask in plain words. For example:
> What is my AgentaOS status?
> Create a monthly plan called Pro at 29 euros.
> Create a discount code LAUNCH20 for 20% off.
> Is my business verification done yet?
Each tool answers with a plain sentence, which your assistant passes on to you.
## Disconnect
In the sidebar, open **Developers → API keys**. Under **API Keys**, find the key with your assistant's name.
Click the delete icon on that key, then **Confirm**.
After that, every tool call from the assistant fails. The error ends with: "The key may have been revoked in AgentaOS. Create a new key, or reconnect the connector." To use the assistant again, add the connector again and approve it.
## Troubleshooting
| Message | What to do |
| - | - |
| This approval expired. Start the connection again. | Add the connector again and approve on the new page. |
| This approval link expired. Start the connection again. | More than 10 minutes passed between adding the connector and approving it. Add the connector again. |
| The connection was declined in AgentaOS. | Add the connector again and click **Approve** this time. |
| AgentaOS has not confirmed the approval yet. Try connecting again. | Add the connector again. |
| The key may have been revoked in AgentaOS. Create a new key, or reconnect the connector. | The key was revoked. Add the connector again and approve it. |
## Next steps
Every tool, and the setup for Claude Code and Cursor.
The walkthrough, from the first prompt to a paid checkout.